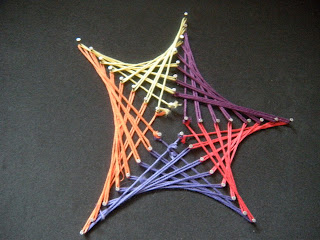
The Beginning Step of a Line Design


The Previous Design Repeated 4 Times

The Beginning Step of a Line Design


The Previous Design Repeated 4 Times
 First, I took a blank white piece of paper and drew the design. This could have been done on graph paper too. It's very important that the lines are measured out, and that the nails are placed in even increments on the line. This should be actual size! When I finished drawing, I took my piece of wood, glued black felt over the board, and then taped my drawing over the black felt. Then, I nailed in all the places where I had drawn! Make sure the nails go through the paper, the felt, and into the wood. The nails should be as straight as possible.
 When all the nails were in, I tore the design paper from the board, and this is what I was left with!

 Look carefully at this parabola. Do you see the curve it forms as it approaches the origin? Well this shape formed by the graph is very similar to that of the shape formed in line designs! Specific line designs actually have mathematical formulas that can be related to graphing in calculus!


x2 - 2xy + y2 - 2Lx - 2Ly + L2 = 0
x-intercept: c
y-intercept: L - c
Erin Appenzoller


 After I was finished hammering ever nail into the wood, I began to make my design using orange and purple string. I tied one end of the string around the first nail of the lower side of the triangle. Then I crossed the string across the middle of the triangle to the eighth nail of the upper side of the triangle. I continued in a pattern: first nail to eighth nail, eighth nail to second nail, second nail to seventh nail, and so on. I stopped when I had wrapped the string around each nail, tied the end of the string, and then moved on to the next triangle.


